How to downgrade macOS 27 to Tahoe or Sequoia
Hello Folks,
We at Daily Techocracy are back with some juicy info for all you kind readers....lets get to it !!
macOS 27 is out, and plenty of people are already asking how to go back. This week, two separate "I went back to Sequoia" posts landed on r/MacOS, next to complaints about the new Finder, the Spotlight design and the glass buttons. If you want your old Mac back, the good news is that it's possible. The bad news is that there is no undo button, so you need a plan. Here is what to do, step by step.
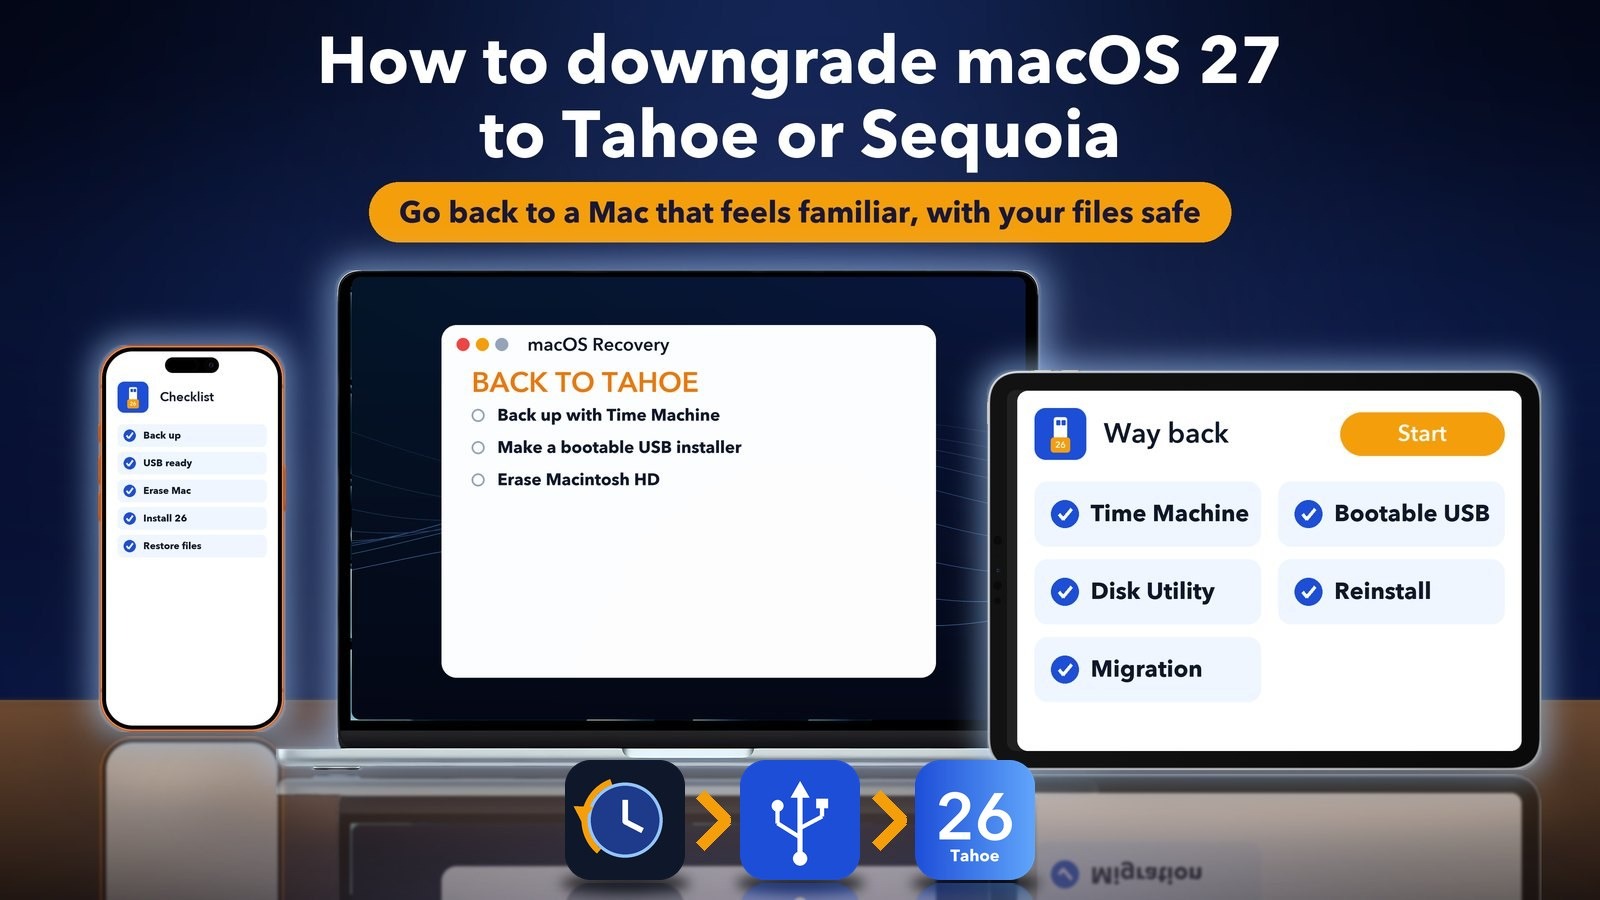
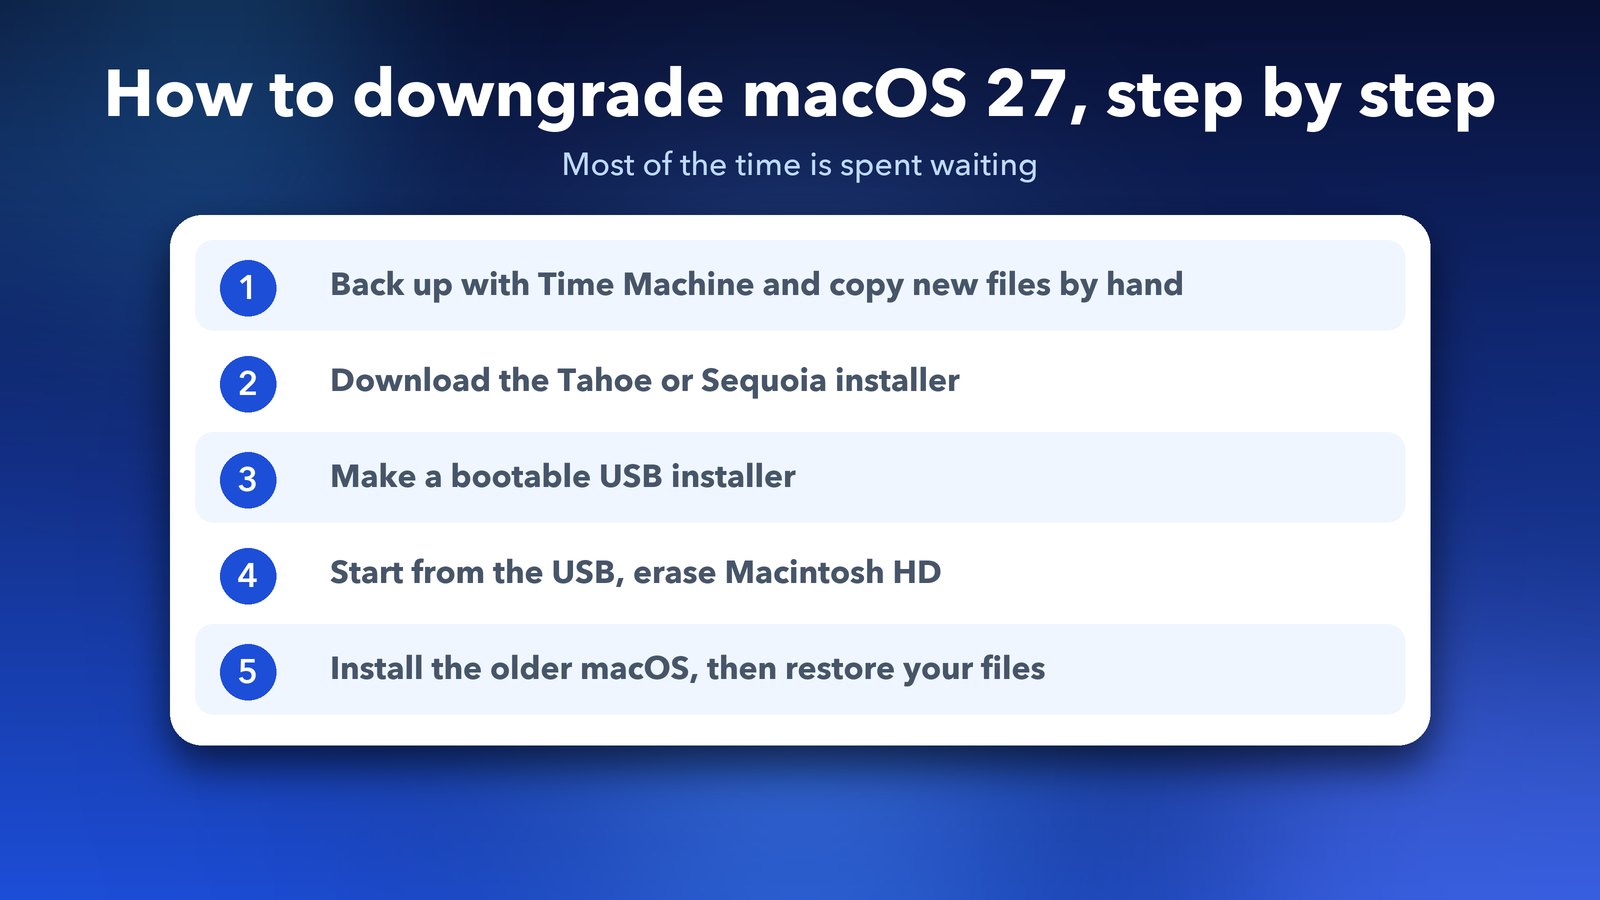
Quick answer: You can't downgrade macOS 27 with one click. You back up your Mac, download an older installer (macOS Tahoe 26 or Sequoia 15), make a bootable USB drive, erase the Mac, install the older macOS, and then bring your files back. A Time Machine backup made after you installed macOS 27 will put you straight back on 27, so use a backup from before the upgrade.
Can you downgrade macOS 27?
Yes, you can downgrade macOS 27, but only by erasing your Mac and installing the older version fresh. Apple doesn't offer an in-place downgrade. Several guides agree that the process wipes the startup disk and can't be undone.
Apple's own pages hint at how it works. On a Mac with Apple silicon, Apple says that if you upgraded macOS and then erased the disk with Disk Utility, reinstalling "might" give you the version you had before the upgrade. That is a "might", not a promise, so I wouldn't rely on it.
One more point matters. Apple's download page says the Terminal tool offers versions "no earlier than the version that came with your Mac". If your Mac shipped with macOS 27, going back may not be possible at all. Apple doesn't say clearly either way, so check before you start.
Should you downgrade macOS 27, or wait?
Wait if your problem is a bug, and downgrade if the design or behaviour simply isn't for you. A downgrade costs you an afternoon.
The macOS 27.2 update already fixed the Mission Control problem that many people complained about. You can read what it fixed and what it didn't in our guide to the macOS 27.2 update. If Siri or Apple Intelligence is what annoys you, you can switch parts of it off instead of leaving. We covered that in how to turn off Apple Intelligence on macOS 27.
Going back also has a cost. Older macOS versions get fewer updates over time. Apple did release Sequoia 15.8.2 and Tahoe 26.7.2 recently, but the older the version, the sooner its updates stop. Tahoe is the safer landing spot for that reason.
What should you do before you downgrade macOS 27?
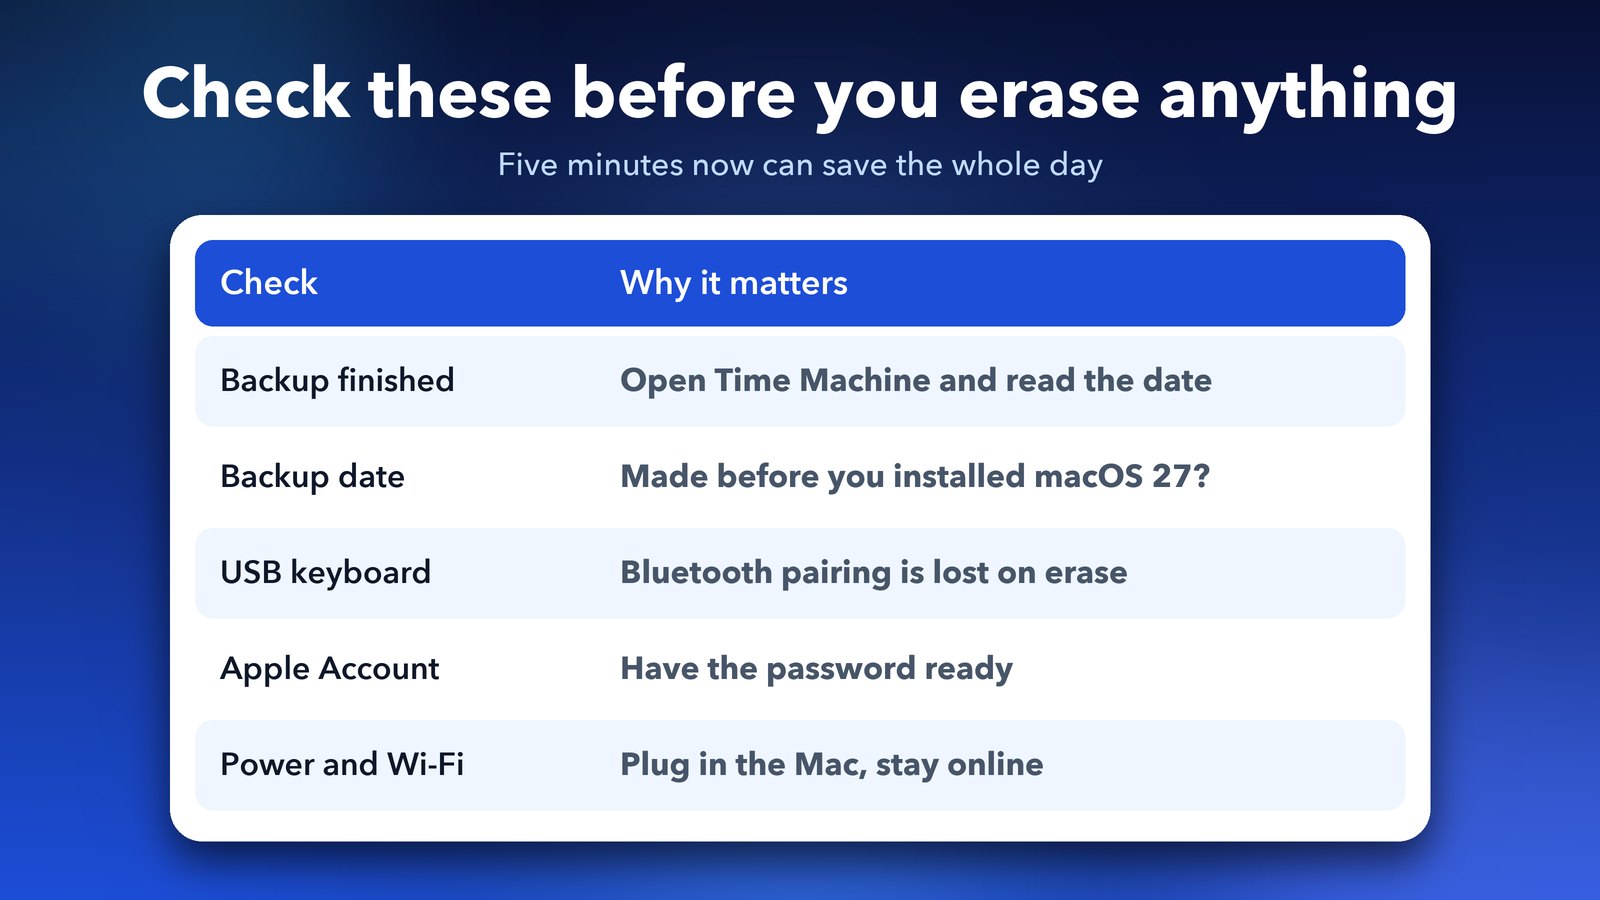
Back up first, and check the date on that backup. Everything on the Mac will be erased, so this step decides whether the downgrade is boring or painful.
- Run Time Machine. Let it finish. Apple's guide says erasing "permanently deletes" the files on your Mac.
- Check the backup date. Open Time Machine and read the date of the latest backup. A backup taken after you installed macOS 27 will bring you back to 27 if you restore the whole system from it.
- Copy new files by hand. Anything you made or downloaded since your last good backup should go to an external drive or iCloud Drive.
- Use a USB keyboard and mouse if you can. Apple warns that Bluetooth devices unpair when you erase a Mac.
- Keep your Apple Account password ready. The erase step may ask for it.
- Plug the Mac in and connect to the internet. The installer needs both.
One risk is unconfirmed. Some apps change their data files on a newer macOS, and older versions may not read them. I couldn't confirm this for Photos or Notes, so export anything important from those apps before you start.
How to downgrade macOS 27 step by step
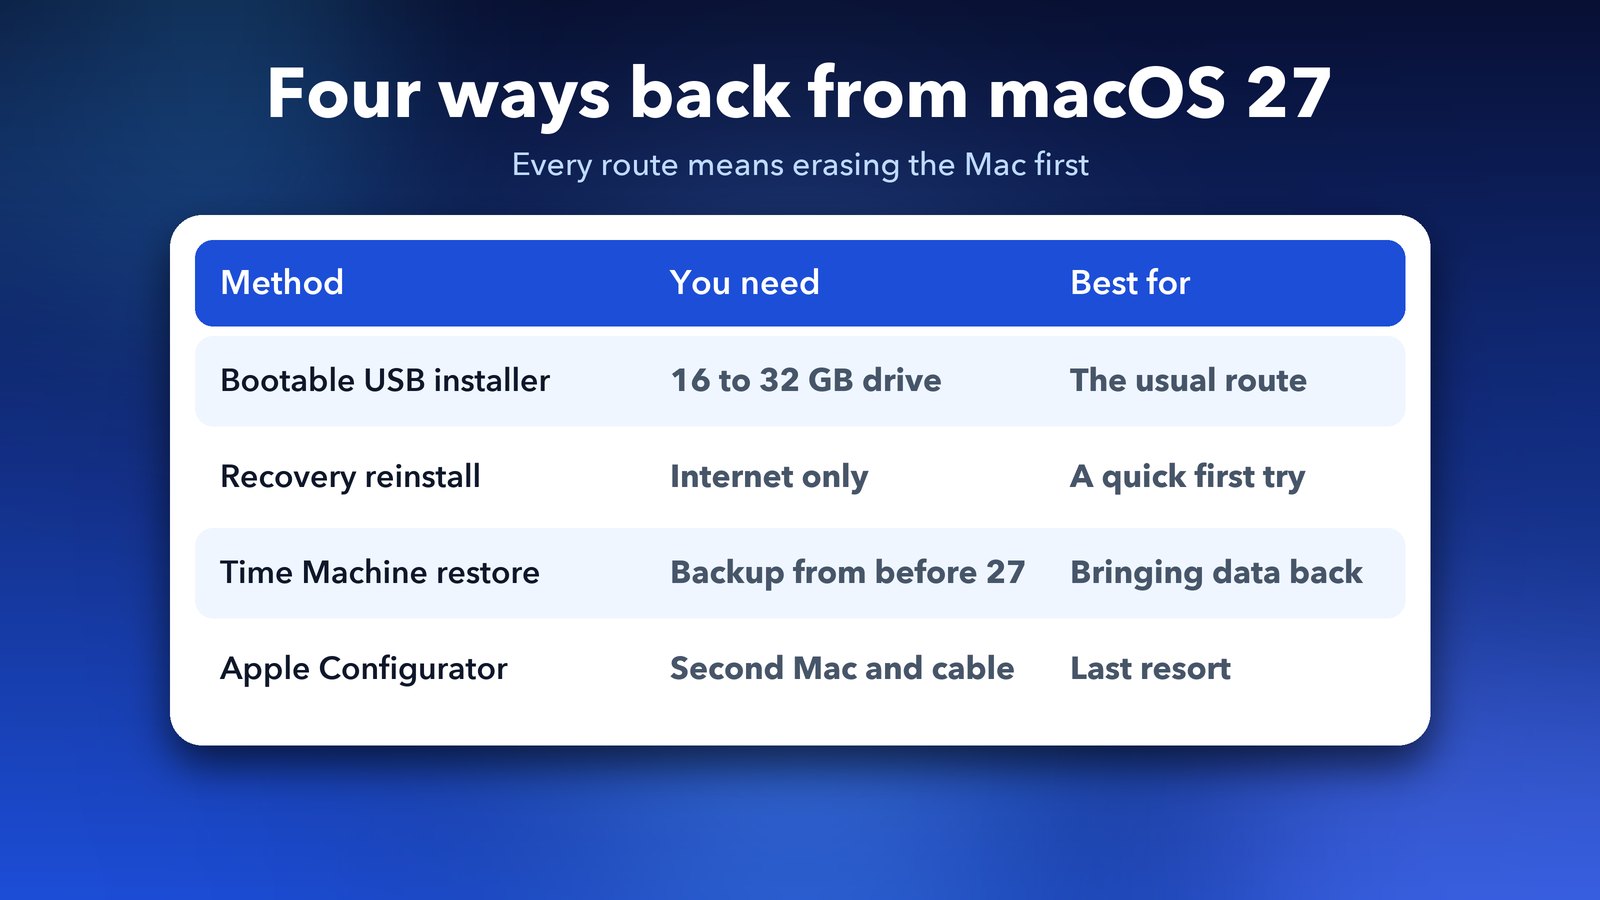
The most dependable route is a bootable USB installer, because it doesn't depend on which macOS your Mac's Recovery offers. Apple documents each part of it. I haven't run the whole chain on a Mac myself, so I'm giving Apple's steps and flagging the parts where Apple is silent.
Step 1: Download the older macOS installer
Apple's page on how to download and install macOS lists two ways. For Sequoia 15 there are direct App Store links on that page. Tahoe 26 isn't in that list, so use Terminal. Open Terminal and run this to see which versions your Mac can get:
softwareupdate --list-full-installers
Then download the one you want by swapping in the version number from the list:
softwareupdate --fetch-full-installer --full-installer-version 26.x
Replace 26.x with the newest Tahoe number the list shows. The installer lands in your Applications folder. If the list doesn't show the version you want, your Mac can't download it this way.
Step 2: Make a bootable USB installer
Apple's guide to creating a bootable installer asks for a USB drive of 32 GB, or 16 GB for most older versions. The drive is erased, so use an empty one. Rename it to MyVolume in Finder first, because the command expects that name.
For Tahoe 26, Apple gives this command:
sudo /Applications/Install\ macOS\ Tahoe.app/Contents/Resources/createinstallmedia --volume /Volumes/MyVolume
For Sequoia 15, change Tahoe to Sequoia in the same line. Press Return, type your admin password (nothing shows as you type), then type Y to confirm. When Terminal says the install media is available, quit Terminal and eject the drive.
Step 3: Start from the USB drive
Shut down the Mac and plug the drive in directly. On a Mac with Apple silicon, press and hold the power button until the startup options appear. Pick the installer, click Continue, and follow the screens.
Step 4: Erase Macintosh HD
Erase the startup disk before you install the older macOS. Apple's page on erasing a Mac with Apple silicon gives these steps in macOS Recovery:
- Choose Disk Utility and click Continue. The utilities window on the USB installer should offer it too, though Apple doesn't spell that out.
- Select Macintosh HD in the sidebar, click Erase, and set the name to Macintosh HD and the format to APFS.
- Click Erase, or Erase Volume Group if you see that button instead.
- Enter your Apple Account details if asked, then click Erase Mac.
- When the Mac restarts, choose a language and connect to Wi-Fi so it can activate.
The menu names may shift a little in macOS 27, since Apple's pages cover several versions.
Step 5: Install macOS Tahoe or Sequoia
After activation, click Exit to Recovery Utilities. Then choose Reinstall macOS, or start the installer from your USB drive, click Continue and follow the screens. Don't let the Mac sleep. It may restart several times.
Step 6: Bring your files back
Once you reach the setup screens, use Migration Assistant or copy your files over by hand. Apple says to restore your data from Time Machine after reinstalling. Pick a backup made before macOS 27, as explained above. Then run Software Update to get the newest Tahoe release.
What if you don't have a USB drive?
You can try a plain Recovery reinstall, but the result isn't guaranteed. Apple says Recovery on Apple silicon installs the current version of the most recently installed macOS. If you erase the disk first, you might get the older version, as noted above. If Recovery only offers macOS 27, stop and get a USB drive.
Don't use Erase All Content and Settings for this. One guide notes it only removes your data, so macOS 27 stays installed. I couldn't find an Apple statement either way, so treat it as a reset, not a downgrade.
What is the last-resort way to downgrade a Mac?
The last resort is Apple Configurator. It needs a second Mac, a USB-C cable and a restore file for your exact model, and it also rolls back firmware. One third-party guide describes it as the most thorough route. Apple has its own page for this, so follow that rather than a blog if you go this way. Most people won't need it.
If your storage looks odd after the move, our guide on how to free up System Data storage on macOS 27 still helps on any Mac you decide to keep on 27.
The short version is to back up, check that the backup is older than macOS 27, make a USB installer, erase, install and restore. If macOS 27 breaks an app you need for work, going back is a sensible call. If you only dislike the look, give it an update or two first.
Image credits: MacBook Air M4 render, iPhone 17 Pro vector (TheGoldenBox) and iPad Pro 11 mockup (Jem Riggs) from Wikimedia Commons (CC BY-SA 4.0), with illustrated screens and a custom wallpaper. USB and Time Machine tiles are original illustrations by Daily Techocracy.