How to change where screenshots save on macOS 27
Hello Folks,
We at Daily Techocracy are back with some juicy info for all you kind readers....lets get to it !!
Every screenshot you take on a Mac lands on the Desktop. After a few weeks, the Desktop is a wall of files called "Screenshot 2026-10-27 at…". For years the fix was one Terminal command. On macOS 27, that command still runs without an error, but your screenshots keep landing on the Desktop. Here is how to change where screenshots save on macOS 27, the easy way and the Terminal way.
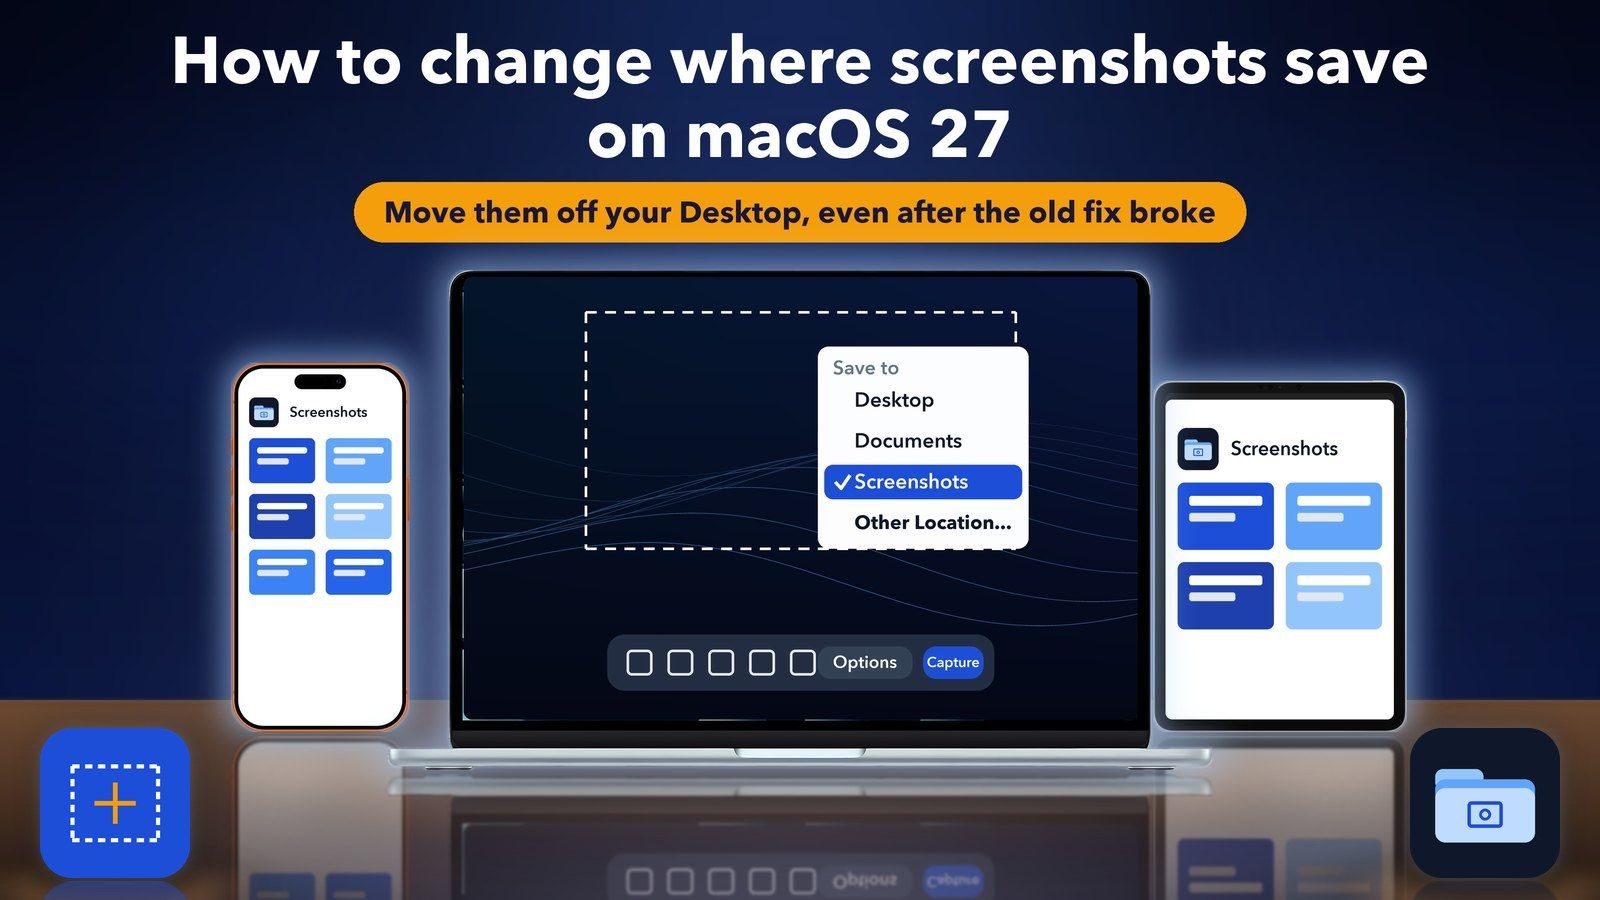
Quick answer: Press Shift-Command-5, click Options, and under Save to pick a folder or choose Other Location. That is Apple's own way, and it works on macOS 27. If you use Terminal or scripts, the old location setting no longer works on macOS 27. Users report that the new key is location-screenshot.
Where do screenshots go on a Mac by default?
Screenshots go to your Desktop. Apple's Mac User Guide says screenshots taken with the keyboard shortcuts are saved there as PNG files, and screen recordings are saved as MOV files. The file name starts with "Screenshot" and then the date and time, so they pile up fast.
That is fine for one or two images. It gets messy when you take ten a day. There is a second reason to move them. If you sync your Desktop and Documents folders to iCloud, every screenshot also uploads to iCloud and takes up space there.
How to change the screenshot location with the Screenshot app
This is the method I would use first. It needs no Terminal, Apple documents it, and it is easy to undo. It works the same on macOS 27 as on older versions.
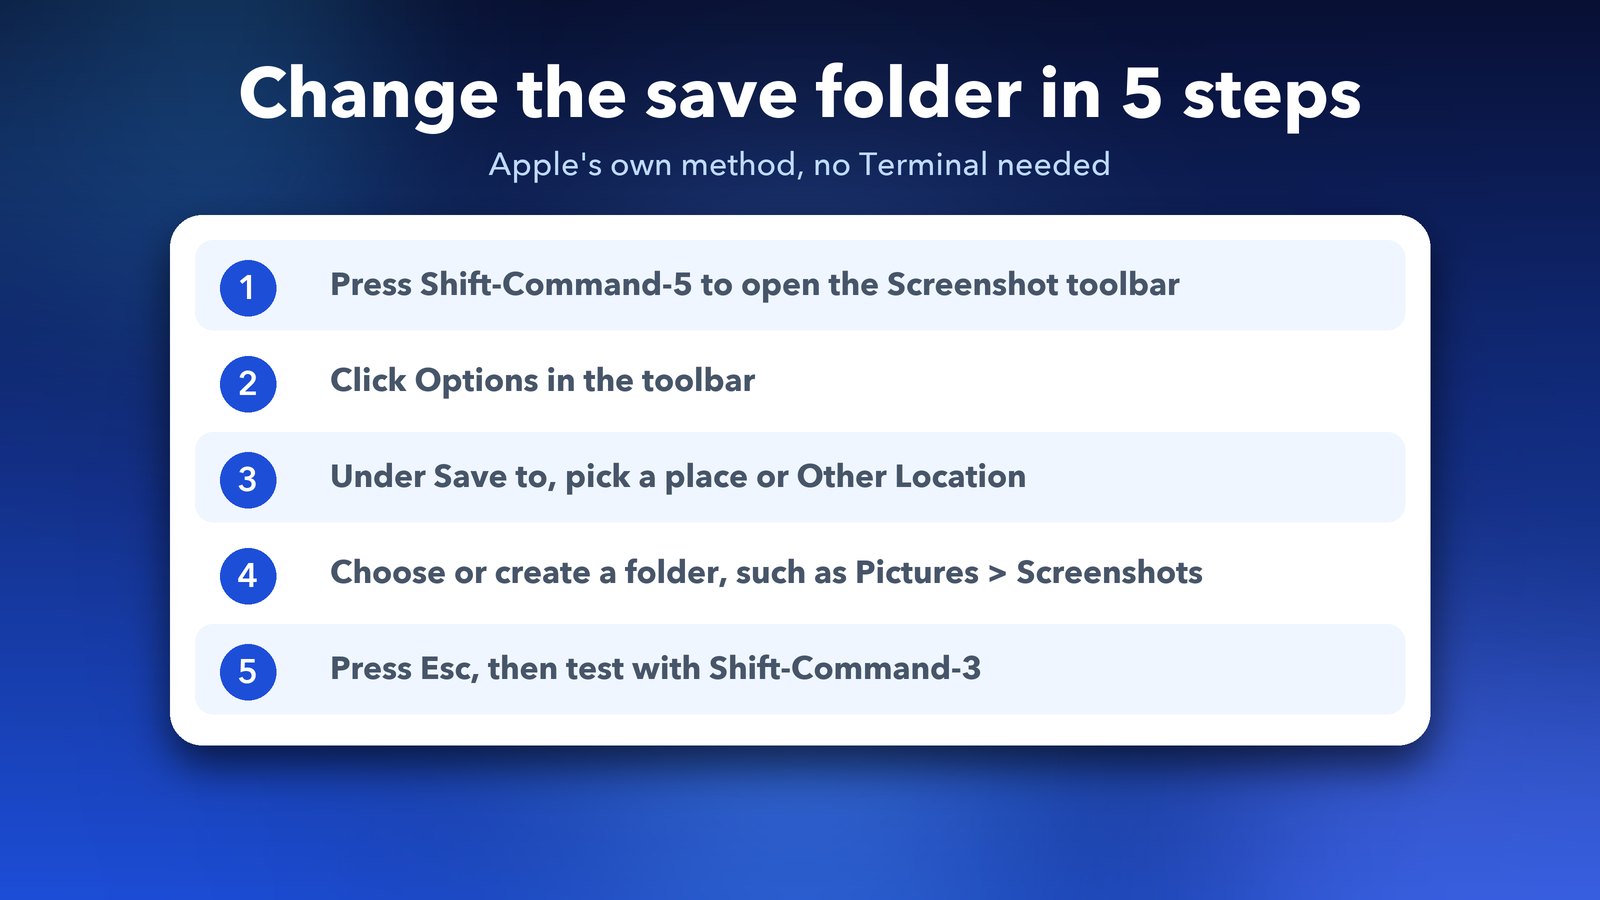
- Press Shift-Command-5. The Screenshot toolbar opens at the bottom of the screen.
- Click Options in the toolbar.
- Under Save to, pick one of the preset places, or choose Other Location.
- If you chose Other Location, pick a folder, or create a new one such as "Screenshots" inside Pictures, then confirm.
- Press Esc to close the toolbar, then take a test screenshot with Shift-Command-3.
The new folder should now show up in the Save to list, so you can switch back and forth later. The steps come from Apple's macOS 27 guide to taking screenshots. You can also open the same toolbar from the Screenshot app in the Utilities folder inside Applications.
Why did the defaults write command stop working on macOS 27?
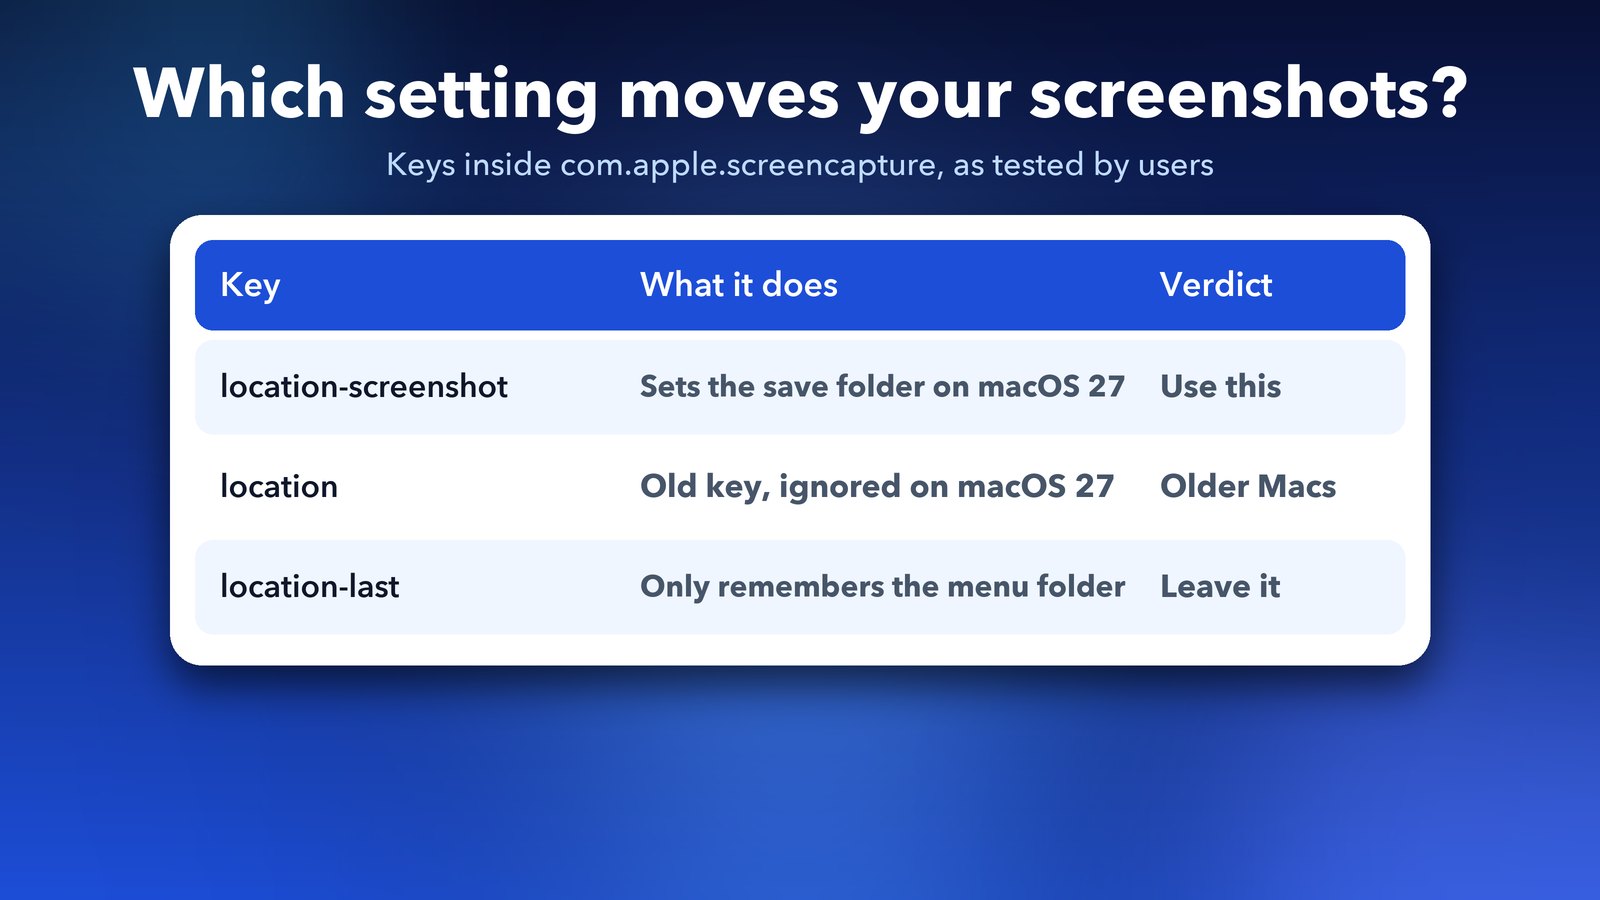
The setting moved to a new name. For years, guides told you to run defaults write com.apple.screencapture location with a folder path. On macOS 27 the command runs, but nothing changes. A user on r/MacOS tested it on macOS 27.0 and found that screenshots now follow a key called location-screenshot instead.
Apple has not documented this change, so treat it as tested by users, not official. The same post says the old location key is simply ignored on macOS 27. A third key, location-last, only remembers the folder shown in the Options menu. It does not set where your screenshots go.
I checked the screenshot settings on a Mac running macOS 27.0 here. They also contain separate entries for screenshots and screen recordings, which fits the idea that Apple split the old single setting in two. I did not change anything on that Mac, so I am going on the Reddit tests for the exact behaviour.
How to change the screenshot location in Terminal on macOS 27
Use this if you set up Macs with scripts or like Terminal. Make the folder first, then point the new key at it and restart the process that handles screenshots.
mkdir -p ~/Pictures/Screenshots
defaults write com.apple.screencapture location-screenshot -string ~/Pictures/Screenshots
killall SystemUIServer
Then take a test screenshot. If it lands in the new folder, you are done. A few things help:
- Make the folder first. The
mkdir -pline creates it if it is missing, so screenshots have somewhere to go. - Keep the -string part. One Redditor said it is not strictly needed for a path, but it stops macOS from guessing the type of the value.
- Use a full path. Typing a full path, or one that starts with ~ for your home folder, avoids trouble. An older report on another site found that a short relative path did not work.
How to send screenshots back to the Desktop
In the Screenshot app, press Shift-Command-5, click Options and choose Desktop under Save to. In Terminal, delete the new setting and restart SystemUIServer:
defaults delete com.apple.screencapture location-screenshot
killall SystemUIServer
That puts things back the way they were when you first set up the Mac.
What if you use more than one Mac?
Write both keys. Older versions of macOS read location and ignore the new name, while macOS 27 reads location-screenshot. Setting both keeps one script working on every Mac you own:
defaults write com.apple.screencapture location -string ~/Pictures/Screenshots
defaults write com.apple.screencapture location-screenshot -string ~/Pictures/Screenshots
killall SystemUIServer
One Redditor goes further and swaps the folder every month, with a script that builds a folder name from the date. That is handy if you keep screenshots for work records. For most people, one Screenshots folder is plenty.
Screenshots still landing on the Desktop?
Work through these checks in order. Most cases end at the first or second one.
- Check the Options menu. Press Shift-Command-5 and look at Save to. If Desktop is ticked there, pick your folder again from that menu.
- Read the saved value. Run
defaults read com.apple.screencapturein Terminal. You should seelocation-screenshotwith your folder path. If you only seelocation, you used the old key. - Restart SystemUIServer. Run
killall SystemUIServeragain, or restart the Mac. - Check the folder still exists. If you renamed or deleted it, macOS has nowhere to save.
- Try a folder in your home folder. An older forum report found screenshots did not like saving outside the home folder. I could not confirm that on macOS 27, but it is a quick test.
Is it safe to change these settings?
Yes. The Options menu is Apple's own control and you can change it back any time. The Terminal command only changes one preference for the Screenshot app. It does not touch system files, and the delete command above undoes it. The only real risk is a typo in the path, which just sends screenshots to the wrong place.
One honest limit: screen recordings may follow their own setting on macOS 27. If your recordings still land on the Desktop, switch the toolbar to a recording mode, open Options and pick the folder there too.
Other screenshot tricks worth knowing
- Skip the file entirely. Add Control to any shortcut, such as Control-Shift-Command-4, to copy the screenshot to the clipboard instead of saving it.
- Drag the thumbnail. When the small preview appears in the corner, drag it straight into an email, a document or a Finder folder.
- Turn off the thumbnail. If the preview slows you down, untick Show Floating Thumbnail in Options. Files then save straight away.
- Pick HDR or SDR. On supported Macs, Options has a Capture Format choice. SDR is the safer pick if you share screenshots with people on normal screens.
Apple's support page on how to take a screenshot on your Mac covers all the shortcuts if you want the full list.
Which way should you go?
If you only have one Mac, use the Options menu in Shift-Command-5. It is quick, it is official, and it survives updates. Use Terminal only if you set up several Macs or run scripts, and write both keys so they work everywhere.
A tidy Desktop also makes files easier to find. If Spotlight is struggling to find things, read our guide on fixing Spotlight not finding files on Mac. If years of old screenshots are eating your disk, our guide on freeing up System Data storage on macOS 27 can help. And if your Desktop syncs to iCloud and gets stuck, see our fix for iCloud Drive stuck on Waiting to Upload. Now press Shift-Command-5 and give your screenshots a home.
Image credits: MacBook Air M4 render, iPhone 17 Pro vector (TheGoldenBox) and iPad Pro 11 mockup (Jem Riggs) from Wikimedia Commons (CC BY-SA 4.0), with illustrated screens and a custom wallpaper. Screenshot and folder tiles are original illustrations by Daily Techocracy.